R-410A Is Out, R-454B Is In – Here’s What You Need to Know

Another big shift is happening in the HVAC world that you need to be aware of. As of January 2025 the HVAC industry began phasing out R-410A refrigerant in A/C units and is switching to R-454B.

Didn’t this just happen with R-22?

Yes. The HVAC industry just completed the transition from R-22 to R-410A in 2020, and now they’re doing it again.

Why? Simply put, R-454B was chosen as a replacement to R-410A because it offers similar cooling performance but is about 4 times more environmentally friendly from an ozone and global warming standpoint.

Here’s what this means for you and your clients:

- Older A/C Systems: If a home has an HVAC unit with R-410A, it will still work - but servicing it will get pricier as the refrigerant becomes less available.

- Newer A/C Systems: After 2025, all new units will use R-454B, which isn’t compatible with older systems. That means replacing just part of an HVAC system won’t always be an option.

- For Buyers & Sellers: If a home’s A/C is 10+ years old, it’s worth checking the refrigerant type and planning ahead for potential costs.

Fortunately this phase out will be less abrupt than the R-22 phase out, but it’s good to be aware of so you can make informed decisions over the coming years.

How Long Does A Deck Typically Last And How Often Should A Wood Deck Be Sealed?

The lifespan of a wood deck can vary depending on a number of factors, including the type of wood used, the climate in the area, the level of maintenance it receives, and the amount of foot traffic and exposure to the elements it experiences.

In general, a well-built and well-maintained wood deck can last anywhere from 10 to 30 years or more.

To help extend the life of a wood deck, it's important to regularly clean it and inspect it for any signs of damage or wear, such as loose boards or rotting wood. Additionally, applying a high-quality sealant or stain to the deck can help protect it from moisture, UV rays, and other environmental factors that can contribute to deterioration.

The frequency with which a wood deck should be sealed can depend on a number of factors, including the type of sealant used, the climate in the area, and the amount of use and exposure to the elements the deck experiences.

As a general rule, however, most experts recommend that homeowners plan to seal their wood decks every 1 to 3 years.

Some signs that it may be time to reseal the deck include faded or discolored wood, rough or splintered surfaces, or water that no longer beads up on the surface of the wood.

Check out this rebate and tax credit calculator for Colorado Homeowners

Did you know that there are significant rebates and tax incentives available for Colorado homeowners to help offset the cost of home energy efficiency and electrification upgrades? 

Sharing this info is a great touch point to your sphere, AND a potential way to leverage these rebates and incentives to help offset the repair or replacement costs of home inspection related repairs. 

To help distill this information, we have put together our own local incentive resource guide here. You can also check out this helpful calculator from Rewiring America here.

Make sure to take advantage of these incentives whenever possible and to educate your clients about what’s available to them. We have also linked our resource guide to our home inspection reports for all relevant recommendations for ease of reference. The last thing we want is for someone to leave this money on the table. 

As always, reach out to us with any questions.

What is “Home Hardening”?

Did you know that embers, not direct flames, are the main cause of house fires during a wildfire?

“Home Hardening” helps protect homes by making them more resistant to embers, heat, and flames. This includes modifying structural materials, design, and the surrounding environment.

Examples of some home hardening measures include:

  • Use fire-resistant roofing (metal, tile, or Class A shingles).

  • Cover vents with metal mesh (1/8-inch or finer).

  • Seal gaps in eaves, rooflines, and siding.

  • Replace combustible siding with fire-resistant materials like stucco or fiber-cement.

With increasing wildfire threats and insurance challenges, home harding will become more relevant in the coming years. Educate yourself now to stay ahead of the curve and prepare your home for the evolving homeowners insurance requirements.

To learn more about home hardening, check out this link:

Here is an example of a home spared in the recent LA fires aided largely by home hardening measures:

What is the probability of Lead Based Paint pre-1978?

We all know that lead based paint (LBP) is a concern for pre-1978 homes, but did you know that the probability of LBP being present in a home heavily depends on its year of construction.

According to the U.S. Environmental Protection Agency (EPA):

  • Homes built before 1940, Appx. 87% contain lead-based paint.

  • Homes built between 1940-60, appx. 69% contain lead-based paint.

  • Homes built between 1960-78, appx. 24% contain lead-based paint.

The use of lead-based paint was banned in residential properties in the U.S. in 1978, so homes built after that year are unlikely to contain it. As with any environmental testing, the only way to confirm the presence of something is to test, but these figures can help you to better understand LBP risks by construction date.

Fortunately we now know that lead is a neurotoxin and should never have been used in household paint, but why was it ever used to begin with?

  • Durability - Lead in paint increased durability, longevity and moisture resistance.

  • Fast drying times - Lead sped up the paint drying process.

  • Color enhancement - Lead pigments provided brighter and longer lasting color.

  • Corrosion resistance - Lead helps protect metal from rust.

Lead is still permitted in certain industrial applications such as road and parking markers and in exterior industrial applications such as steel bridges, but was banned in residential paint and coatings in 1978.

How Recent LA Wildfires May Impact Colorado Homeowners Insurance

Homeowners insurance in Colorado's foothills has become increasingly challenging since the Marshall Fire in December 2021, which caused over $2B in damages. The recent wildfires in Los Angeles and rising natural disasters nationwide are straining the insurance industry, and Colorado homeowners will feel the impact sooner than you may think.

Insurers are reassessing wildfire risks, potentially leading to:

Premium Increases: Higher rates in wildfire-prone areas like Colorado. Local insurers are now saying that it’s not just the foothills that are being assessed as high wildfire risk.

Policy Cancellations: Many carriers are not renewing policies in high-risk areas, especially the foothills.

Stricter Coverage Requirements: Homeowners may need fire mitigation measures (e.g., defensible space, home hardening) to maintain coverage. On site inspections will be required in many cases to obtain and maintain coverage.

Reduced Coverage Options: Some insurers may limit wildfire claims or cap payouts. The Colorado FAIR Plan will provide basic coverage, but it may come with challenges.

Now is the time to educate yourself and clients on fire mitigation. More to come on "Home Hardening" and what you need to know to keep your homes protected.

Why Window Replacements Aren’t the Top Energy Efficiency Fix

The window industry is going to hate me for this, but this is a topic that I have studied in depth since I began my education and career in the home performance profession in 2007. 

When it comes to improving home energy efficiency, it’s a common belief that replacing windows should be the first step. While upgrading old windows does help improve home comfort and efficiency, it’s almost always not the most impactful or cost-effective home performance solution.

Here’s why:

  • Heat Loss Priorities: The biggest sources of energy loss are typically poorly insulated attics, walls, and basements/floors—not windows. Just think about how much surface area your windows account for as compared to your walls, floors and ceilings.

  • Cost vs. Benefit: High-performance windows are expensive, but their energy savings may take decades to offset the upfront cost. The cost of wall, attic and flooring insulation is relatively low.

  • Air Sealing is Key: Drafts and leaks around doors, vents, and other openings contribute significantly to energy loss. Sealing these gaps can have an immediate impact.

For the most impactful results and high ROI, prioritize insulation and air sealing, then consider window upgrades as part of a long-term energy plan. Investing in these areas first ensures the greatest return on your energy efficiency improvements.

With that being said, every home is different and it’s always best to start with a comprehensive Home Energy Audit to assess, determine and prioritize your options for energy efficiency optimization. While we have deep roots in home energy audits, we do not currently offer this service, but do have some local recommendations on our Home Service Provider list.

Significant rebates, tax credits and incentives are available for home energy audits and home efficiency upgrades through the utility companies and on the local, state and federal level. Be sure to check out our Energy Efficiency and Electrification Resource Guide for more information.

Foundation Moisture Prevention

We have said it before, and we will say it again and again. Moisture management is critical when it comes to your home. We have seen firsthand how proactive steps can save homeowners from major headaches down the road, and conversely how improper moisture management has caused floods, structural issues and mold. Below are some tips to know and share.

Ensure Proper Grading Around the Home

  • The ground should slope away from the foundation at least 6 inches over the first 10 feet. This helps direct water away from the house.

  • At the very least, just make sure that water is draining AWAY from the home.

Maintain and Extend Downspouts

  • Downspouts should discharge water at least 4-6 feet away from the foundation.

  • Recommend installing downspout extensions to prevent water from collecting near the foundation.

Clean and Repair Gutters

  • Clogged or damaged gutters can cause water to overflow and seep into the foundation. Water spilling over from clogged gutters led to a lot of basement flooding last year during the heavy rainfalls that hit the Denver-Metro area.

  • Regularly clean gutters, especially in the fall.

  • Suggest ensuring all gutter joints are sealed and securely attached.

Install a French Drain or Drainage System

  • If the property has a history of water pooling near the foundation, recommend consulting a professional to install a French drain or other drainage solutions.

Check for Cracks in the Foundation

  • Small cracks can allow water to seep in. Inspect the foundation regularly and use an appropriate sealant to fill any minor cracks.

  • For larger cracks, suggest consulting a structural engineer or foundation specialist.

Maintain Proper Landscaping

  • Trees and shrubs should be planted at least 5-10 feet from the foundation to prevent root intrusion and soil moisture issues.

  • Opt for native plants that require less water, reducing the risk of over-saturating the soil.

Install a Sump Pump

  • In areas prone to heavy rainfall or high water tables, a sump pump can help remove excess water from around the foundation.

  • Recommend testing the sump pump regularly to ensure it's operational.

Waterproof the Basement or Crawl Space

  • Suggest using waterproof paint or sealants on basement walls to reduce moisture intrusion.

  • Install a vapor barrier in crawl spaces and ensure that it’s properly sealed.

Monitor Drainage After Heavy Rain

  • Walk around the property after a rainstorm to check how water is draining and identify any problem areas early.

What you Need to Know About Outdated Electrical Panels

You may already be an expert at guiding your clients through the home-buying or selling process, but here’s a tip that could save everyone some headaches. Check the electrical panel. Seriously, it’s one of those details that can make or break a smooth transaction.

Electrical panels are the heart of a home’s electrical system, but not all panels are created equal. Some older models or specific brands have a track record of safety issues, and get flagged during a home inspection possibly leading to expensive negotiations. Being proactive about identifying potential panel problems early on can help you set realistic expectations for your clients. Which Panels Raise Red Flags?

Federal Pacific Electric (FPE) Panels: These panels are notorious for failing to trip during electrical surges, significantly increasing fire risks.

Zinsco Panels: Known for overheating and melting, these panels are a serious safety hazard.

Fuse Boxes: Often found in older homes, they weren’t built to handle the demands of modern electrical usage.

Pushmatic Panels: These panels lack a main breaker, which complicates emergency shut-offs and can lead to safety concerns.

If you know the home has an outdated panel, suggest replacing it before listing to avoid surprises. You can prepare your buyers and let them know that certain panels might need to be upgraded, especially in older homes before inspection.

Home Inspection Terminology: A Guide for Real Estate Agents!

At Alpine Building Performance, we’re excited to introduce our educational series (Part 1 and 2) designed to help real estate agents navigate the often complex terminology used in home inspections and residential construction. Whether you’re new to the industry or looking to deepen your expertise, this guide is here to clarify the essentials - and a few lesser-known terms. Let’s dive in!

Roofing Terminology

Starting at the top, here are some fundamental roofing terms to know:

  • Roof Deck/Roof Sheathing: The structural base of the roof, typically made from plywood or oriented strand board (OSB), where roofing materials are applied.

  • Underlayment: A moisture-resistant layer placed between the roof deck and shingles, made of felt or synthetic material.

  • Flashing: Metal or other materials used to direct water away from roof joints, such as chimneys and vents, preventing leaks.

  • Eaves: The overhanging edges of the roof that extend beyond the exterior walls.

  • Ridge: The peak of the roof where two slopes meet.

  • Soffit: The underside of the roof overhang, often ventilated to support attic airflow.

  • Fascia: The vertical board along the roofline, where gutters are typically mounted.

Exterior Terminology

The exterior of a home is a major focus in inspections. Here are key terms every agent should know:

  • EIFS (Exterior Insulation and Finish System): A multi-layered exterior cladding system offering insulation, waterproofing, and a decorative finish. Proper installation is crucial to avoid moisture issues.

  • Capillary Break: An air gap between materials to prevent moisture wicking into building components, such as between siding and the ground.

  • Brick/Stone Veneer: A facade that serves as siding rather than a structural wall. Unlike solid brick walls, veneers are primarily decorative.

  • Pressboard Siding: Engineered wood siding made from compressed wood fibers, resin, and wax. While affordable, it’s prone to moisture damage without proper maintenance.

  • Fiber Cement: A durable, moisture-resistant siding made from cement, sand, and cellulose fibers, often mimicking wood or stucco.

  • Balcony vs. Deck: A balcony is accessed only from the interior and lacks stairs to the ground, while a deck is open and typically has exterior stairs.

  • Flatwork: Refers to horizontal surfaces like concrete sidewalks, patios, or driveways.

  • Weep Holes: Small openings in masonry or window frames that allow trapped moisture to escape, preventing structural damage.

Understanding Mold Testing and Inspection Services - Colorado

Mold can cause a host of undesirable problems, including potential health issues for occupants. In more advanced cases, it can even lead to significant building damage. Mold thrives in environments that offer oxygen, excess moisture, and a food source of organic materials such as wood and other common building materials. Whether you're a homeowner concerned about mold or a homebuyer evaluating a prospective property, our mold testing and inspection services, conducted by Certified Mold Professionals, can help you understand mold levels in your home.

Is Mold a Problem in Colorado?

Although Colorado's dry climate is less conducive to mold growth compared to more humid regions, homes and buildings in Denver, Colorado, and surrounding areas are still vulnerable to mold issues. Sources of moisture, such as plumbing leaks, exterior drainage problems, and high humidity levels from weather fluctuations, can lead to mold growth in Colorado homes.

It’s important to note that mold spores are present everywhere, and complete elimination of all mold is impossible. However, knowing the types of mold that may be harmful to your health and understanding what mold levels are acceptable can help you determine whether your home requires mold mitigation.

Mold Testing and Inspection Services in Denver, CO

At Alpine Building Performance, we offer thorough mold testing and inspection services for homeowners and buyers throughout Denver and surrounding Colorado areas. Our Certified Mold Professionals utilize industry-standard testing methods to provide detailed analysis of mold contamination. By understanding what types of mold are present and at what levels, you'll be better equipped to make decisions regarding your property’s health and safety.

Key mold testing services include:

  • Mold & Air Quality Test: This test identifies and quantifies mold spores present in the air. It's particularly useful when visible mold may not be present, or if you're seeking peace of mind about potential mold contamination. This service is a great add-on to our general home inspection services, which already include a visual mold check.

  • Air Quality Testing: This test assesses the air for harmful pollutants that may impact the health of your home’s occupants. It’s an excellent option for anyone concerned about indoor air quality in their home or business.

Our mold air testing service follows strict industry standards and includes three air samples that are taken on-site and sent to a nationally accredited laboratory for analysis. A comprehensive mold report is typically delivered within 24 business hours. Additional samples can be added if needed, and these can be ordered before or during the site visit at the client’s request.

Why Choose Our Mold & Air Quality Testing?

At Alpine Building Performance, we’re committed to providing peace of mind for homeowners and homebuyers throughout Denver, Colorado, and surrounding areas. Our mold and air quality testing service is executed by our IAC2 Certified Environmental Consulting Manager, ensuring accurate and professional results. Our thorough testing process provides you with invaluable insights into potential air contamination and mold hazards in your home, empowering you to take the necessary steps for your health and property safety.

If you're looking for a reliable and experienced partner for mold inspection and air quality testing in the Denver area, we’re here to help. Schedule an inspection online today or contact us directly to learn more about how our services can benefit you.

For more information on mold, check out our additional blog posts:

Let us help you safeguard your home with the expertise and professional service that Denver and surrounding Colorado residents trust. Contact Alpine Building Performance for all your mold testing needs today!

Why are old Denver homes all made of solid brick?

The answer to this question dates back to April 19, 1863 when a fire broke out in a building between Blake and Market Street in what we know today as LoDo. The fire spread rapidly due to the predominance of wooden buildings and destroyed approximately 50 buildings, including stores, hotels, and other businesses along Blake, Market, and Larimer Streets.

After the fire, Denver's residents and city officials realized that the extensive use of wood in construction posed a major fire risk. As a result the Brick Ordinance was born. The ordinance led to a shift away from temporary wooden structures toward more durable and fire-resistant materials, helping prevent future large-scale fires and improving public safety. The ordinance led to a shift away from temporary wooden structures toward more durable and fire-resistant materials such as brick and stone.

Given Denver’s abundance of clay, brick construction was accessible and became the standard of commercial and residential construction for nearly a century to follow. For more information on this piece of local history, check out the below article from Colorado Public Radio.

https://www.cpr.org/2019/07/01/denvers-brick-legacy-is-rooted-in-a-fire-and-the-smell-of-burning-bacon-in-the-air/


3 Things You Need To Know About Our Lead Based Paint Inspection

Have you wanted to ensure your home is free from lead paint but aren’t sure where to start or how complicated the process might be? Here’s a quick guide on what you need to know!

  1. It's a non-invasive inspection. Our lead-based paint inspection is non-invasive thanks to our state-of-the-art XRF (X-ray fluorescence) technology. Unlike traditional methods that require cutting out paint samples and potentially damaging your home, our advanced XRF analyzer allows us to detect lead in paint quickly and accurately without any destruction. This means we can ensure your home’s safety while preserving its condition, providing you with peace of mind and maintaining the integrity of your property.

  1. Our XRF technology scans every layer of paint down to the original surface. This advanced method allows us to identify lead presence not just on the top layer but in all underlying layers of paint. By analyzing each layer, we can provide a thorough assessment of potential lead hazards, giving you complete confidence in the safety and compliance of your home.

  1. Our XRF gives instant results. Each scan takes only 3 seconds to complete, providing immediate feedback on the presence of lead in paint layers. This quick turnaround time allows us to promptly deliver detailed reports, ensuring you receive comprehensive information without delays. 

The Nest Assured Home Health Testing Bundle

Pregnant women and babies are the highest risk individuals for lead poisoning and air quality issues! Nest Assured is the first of its kind home health testing service created to serve expecting mothers, families, and those with babies and young children to help ensure a lead and mold safe environment. Our Nest Assured Bundle tests for lead paint, water quality and air and mold quality. Our EPA approved testing equipment and licensed technicians will put your mind at ease so that you can Nest Assured. 

The nest assured Story

Nest Assured was born in 2024 as a way to help educate and ensure the health of pregnant women, expecting families and those with babies and young children. Andrew Sams, the founder and owner of Alpine Building Performance is the father of 2, and soon to be 3 children. As a passionate healthy home advocate, Andrew realized the need for this service leading up to the birth of his second child. “Ensuring the optimal health of my wife during pregnancy through clean water and air became abundantly clear to me as a top priority. I tested our water, air and paint because I had the knowledge of the potential threats to our family and had the luxury of doing so as the owner of a company that performs these services. There is so much legitimate emphasis put on prenatal diet and nutrition, but so little awareness and education about ensuring optimal water and air quality. Furthermore, when our daughter was born, I was extremely cautious about continuing to monitor her air and water quality for optimal health. Developing bodies are particularly susceptible to small concentrations of toxins. It’s my duty as a father to protect my family in every way that I can and I want to ensure that these testing services and resources are available to all.”

Who this is for?

Protection from the dangers of lead and mold should be a basic human right, and this service can benefit anyone that lives indoors. Nest Assured was created for pregnant women, expecting families and those with babies and young children.

The Nest Assured service is applicable to any dwelling whether owned or rented, single family, townhome or condo. This service is recommended for pre-1978 dwellings due to the use of lead paint during that time period, however post 1978 dwellings can still have water and air quality issues and should be tested accordingly.

The only way to know the safety of your nest is to test. The best possible outcome is that your nest is free of harmful toxins and safe for you and your family. If testing determines that it’s not an ideal environment, we will help guide you to simple and straightforward solutions for improvement.

What Testing services are Included With Nest Assured?

Lead Paint Testing - Interior

Water Quality Testing

Mold and Air Quality Testing

Optional Add On Services

Radon Testing - Exterior Lead Paint Testing - Asbestos Testing

WhY Test The Paint, Water and Air?

Lead paint is a neurotoxin that can be ingested through paint chips and dust.

Lead in water is a neurotoxin that can be ingested through drinking.

Lead consumption whether through paint or water presents a serious risk to pregnant women and children. Some risks include developmental issues, organ damage and neurological development damage.

Source: https://www.phila.gov/guides/lead-guide/dangers-of-lead/

Mold is an allergen/toxin that can be inhaled.

Radon is a carcinogen that is inhaled.

*Radon testing is not included in the base Nest Assured bundle and is available as an add on service.

Why You Should Get a 1-Year Builder Home Warranty Inspection

Congratulations! You’ve almost reached your first anniversary as the owner of your newly constructed home. It’s an exciting milestone, but it’s also a crucial time to make sure everything in your home is functioning properly. While new homes come with the promise of modern design and updated systems, they’re not immune to defects. This is why a 1-Year Builder Home Warranty Inspection is one of the most important steps you can take to protect your investment.

What Is a 1-Year Builder Warranty?

Most builders offer a 1-year warranty that covers various components of the home, including structural elements, mechanical systems, and appliances. During this period, any defects in materials, workmanship, or installation can often be addressed at no cost to the homeowner. However, once that warranty period expires, any issues that arise could fall on you and repairs can become costly.

Why Is a 1-Year Builder Warranty Inspection Important?

Many new homeowners mistakenly assume that just because their home is new, it won’t have any problems. The reality is, even newly constructed homes can experience issues that might not be immediately visible. Over time, these small problems can grow into larger, more expensive repairs if left unchecked. A 1-Year Builder Home Warranty Inspection gives you the chance to identify these issues before your warranty runs out, saving you thousands of dollars in future repairs.

Key Benefits of a 1-Year Builder Warranty Inspection

Identify Hidden Defects Early

Many issues in a new home don’t become obvious until after you’ve lived in it for a while. Whether it’s foundation settling, roof issues, or plumbing problems, a thorough inspection can reveal potential defects that can be claimed under your builder’s warranty.

Comprehensive Review of All Systems

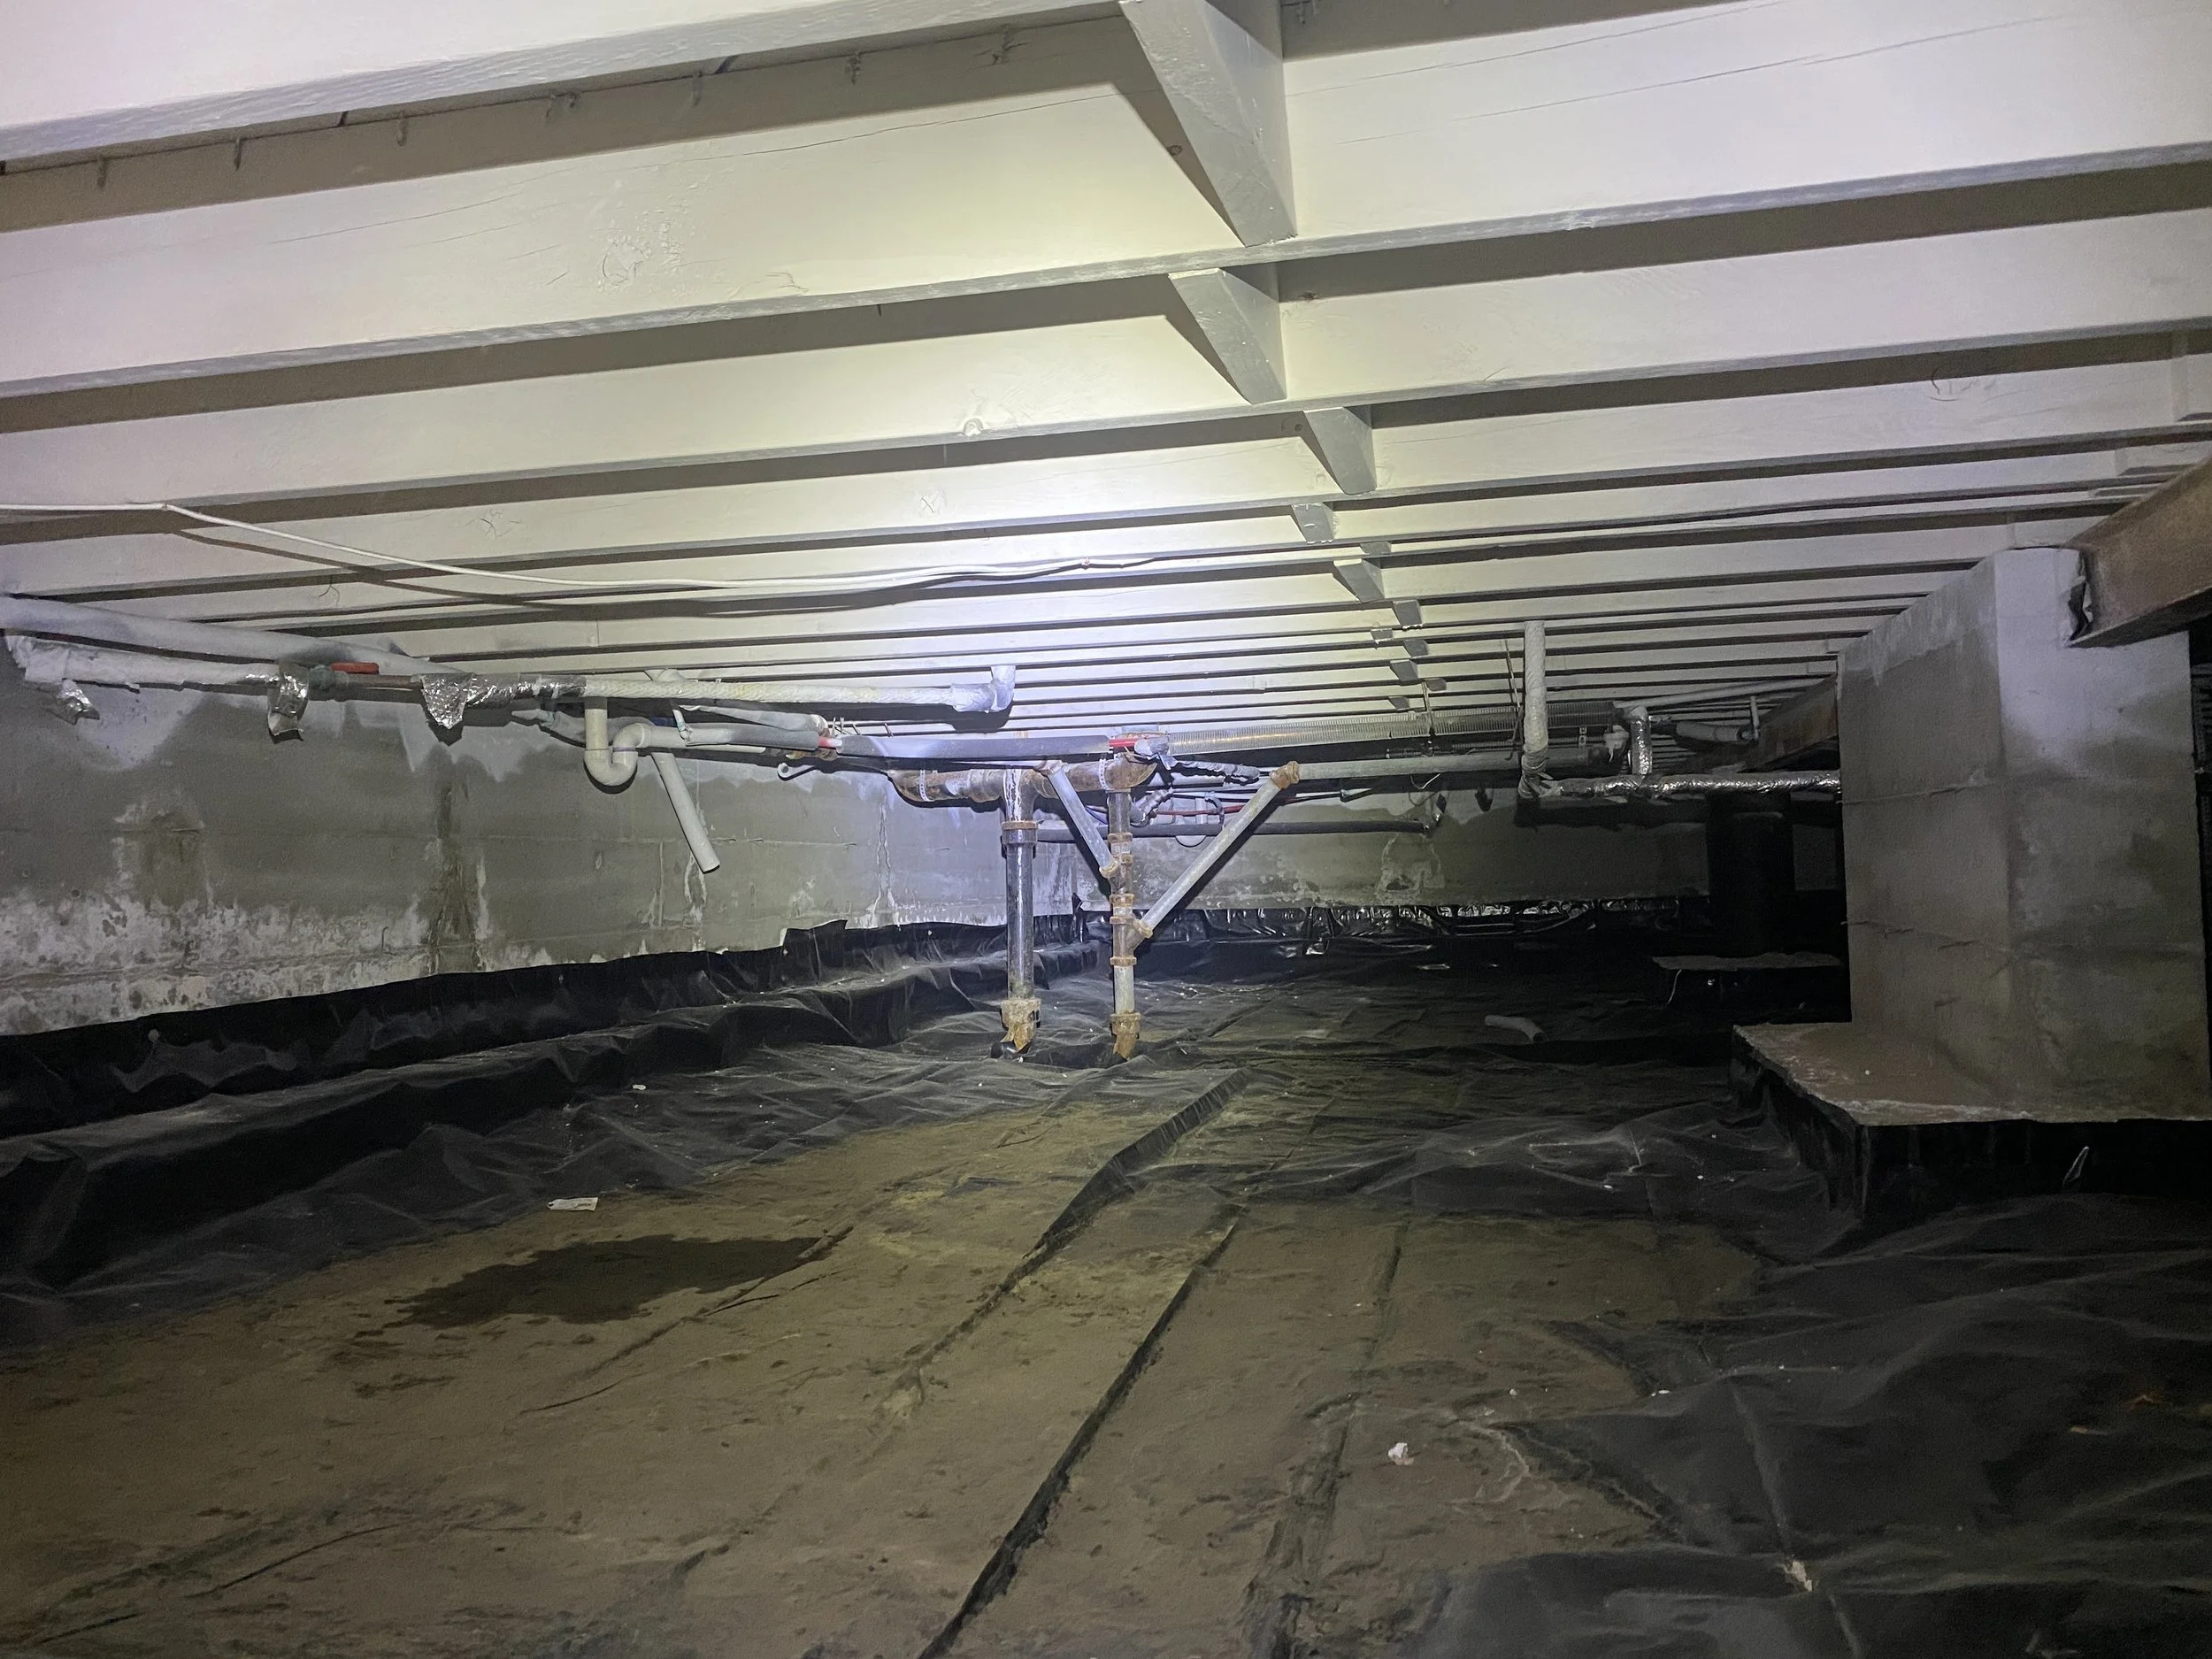
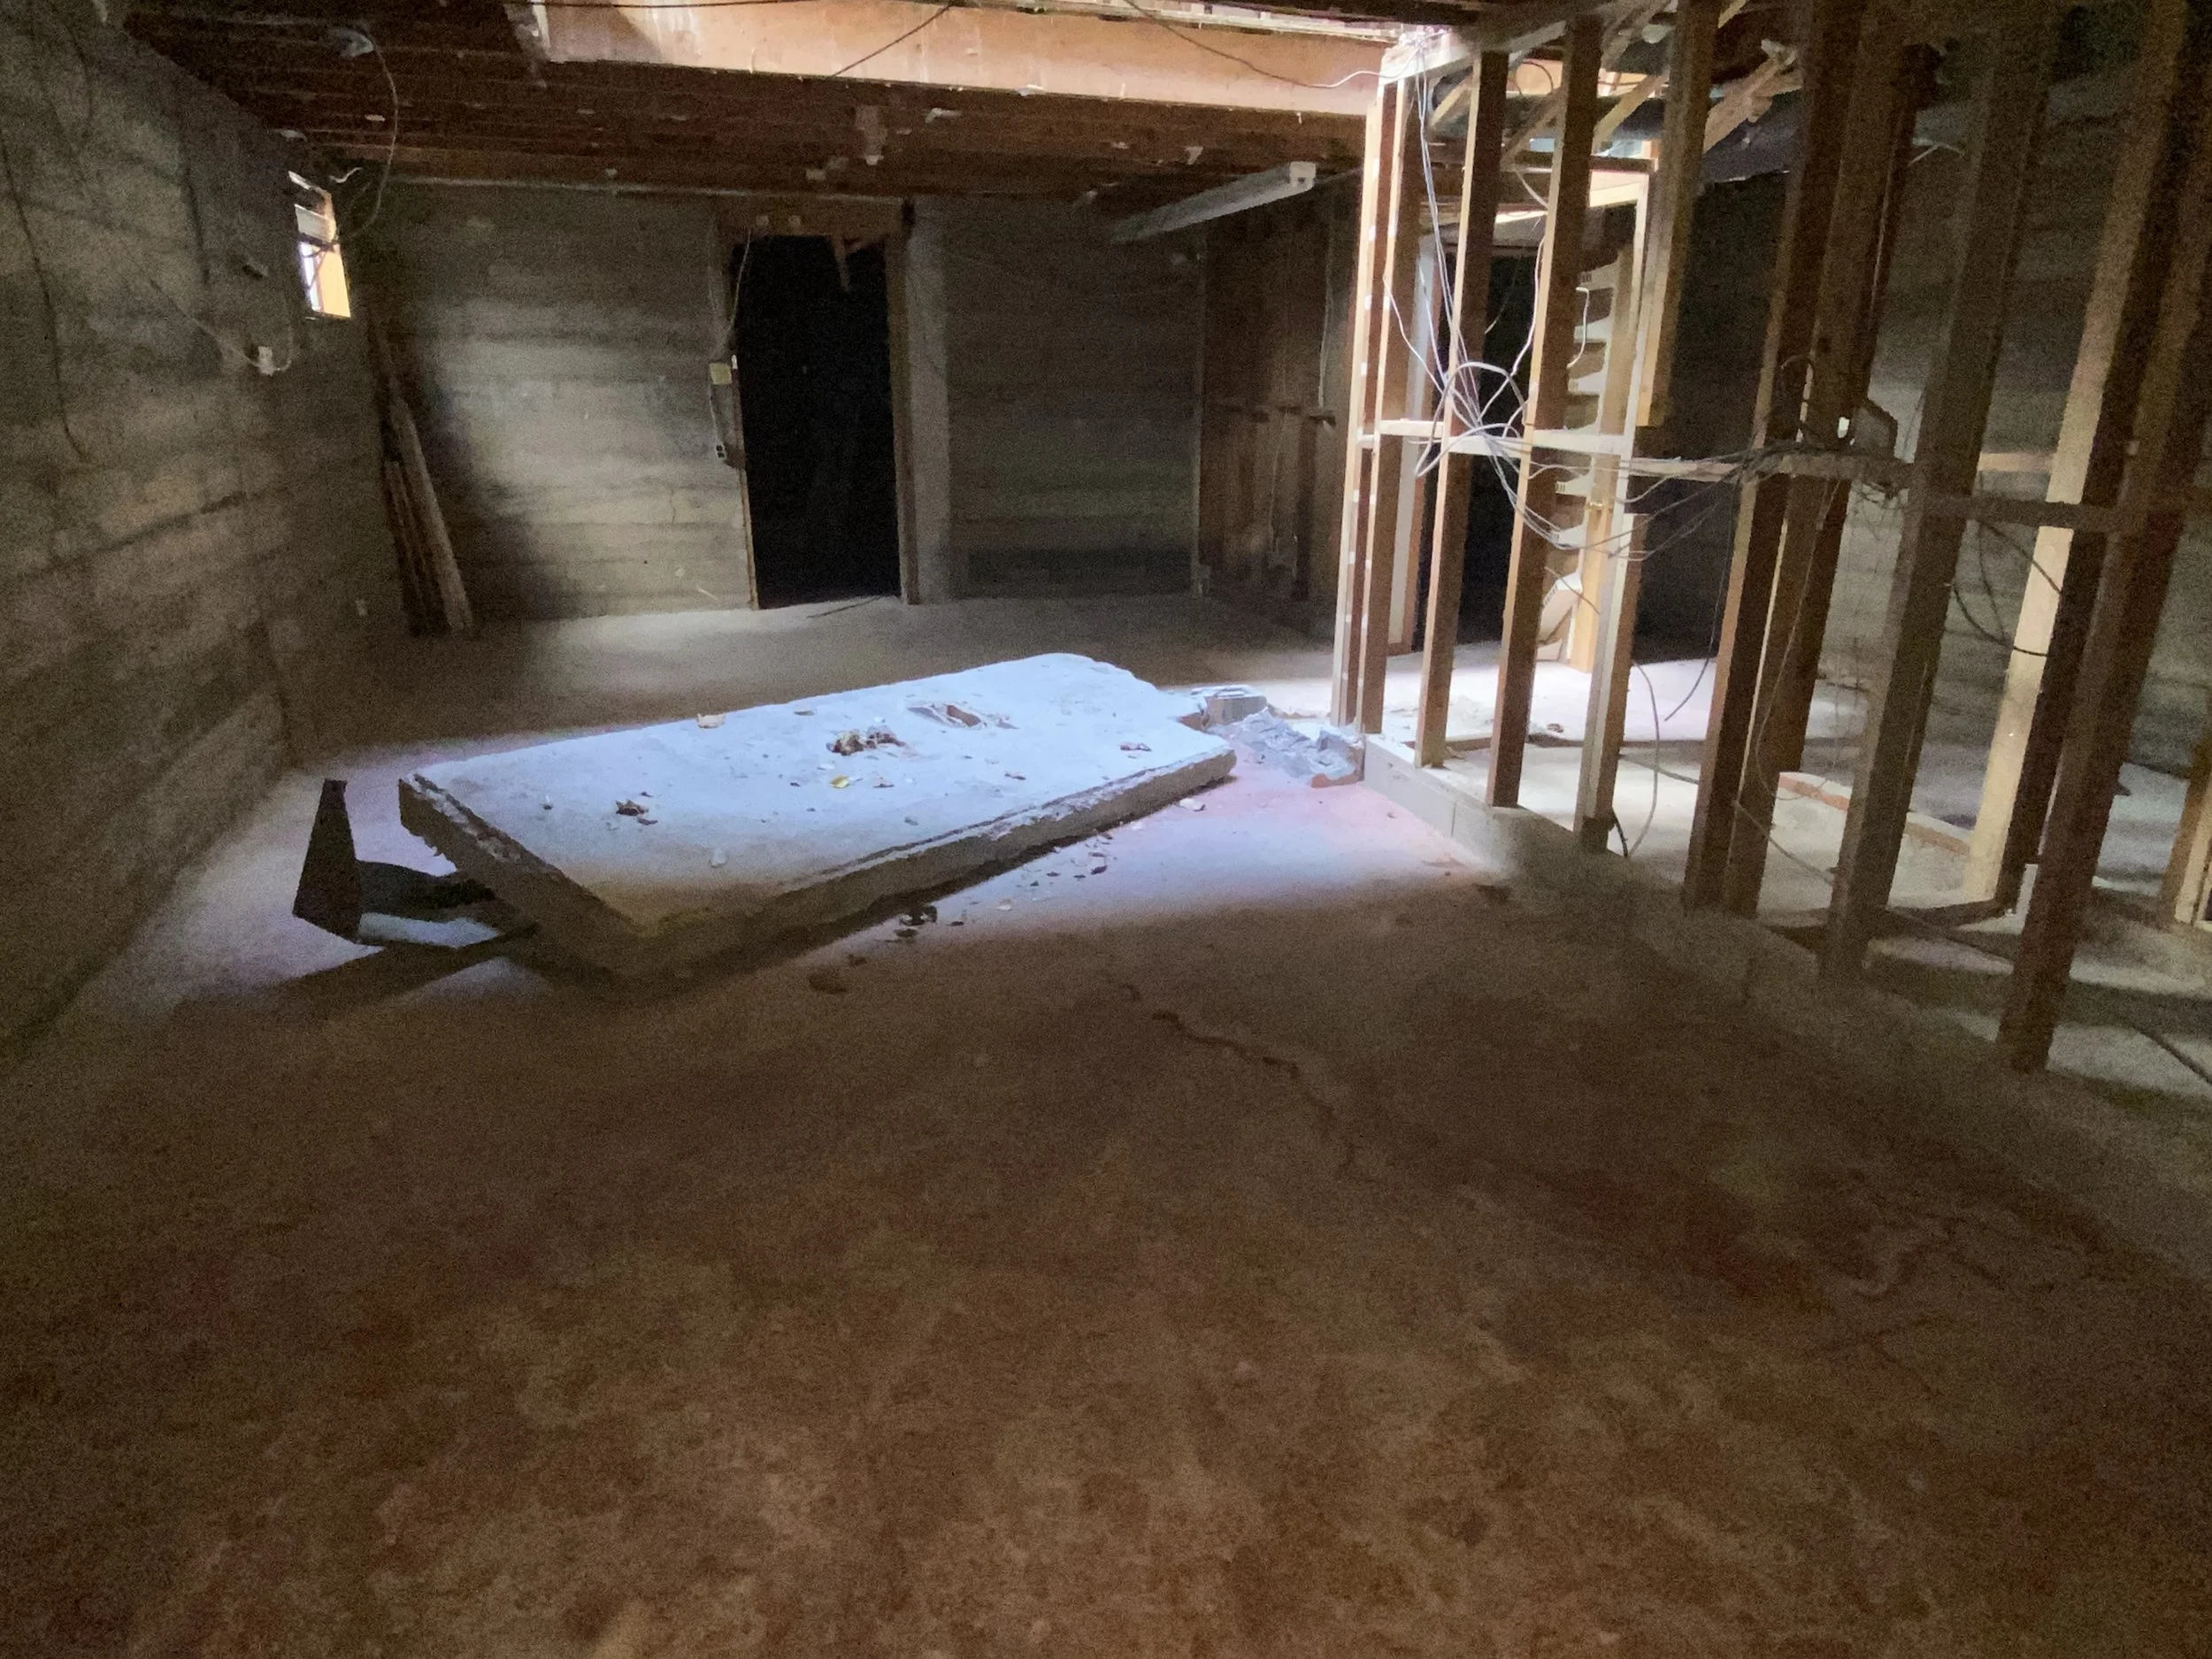
At Alpine Building Performance, our inspection covers your home from top to bottom. We examine key systems, including electrical, HVAC, plumbing, foundation, roofing, and more. This helps ensure every aspect of your home is functioning as it should be.

Detailed Report for Warranty Claims

Once the inspection is completed, you’ll receive a comprehensive report detailing any issues or areas of concern, complete with photos and videos. This documentation is critical when filing warranty claims with your builder. It serves as proof that the issues existed before your warranty expired.

Save Money on Future Repairs

Catching issues during the warranty period means that your builder will typically cover the cost of repairs. Once the warranty expires, you’re responsible for these costs, which can range from minor fixes to major structural repairs. A 1-Year Builder Warranty Inspection is a smart financial move that can save you thousands of dollars.

Peace of Mind

The first year of owning a new home should be about settling in and enjoying your space - not worrying about potential problems. A warranty inspection gives you the peace of mind that comes with knowing your home is in good condition, and any necessary repairs will be handled before the warranty expires.

When Should You Schedule Your Inspection?

We recommend scheduling your 1-Year Builder Warranty Inspection one to two months before your warranty expires. This gives you enough time to review the report, submit warranty claims, and coordinate repairs with your builder. If you wait too long, you may miss the window to take advantage of your warranty coverage.

What to Expect During a 1-Year Builder Warranty Inspection

At Alpine Building Performance, we follow a systematic approach to ensure every part of your home is inspected thoroughly. Our professional inspectors will:

  • Examine the roof, attic, and insulation

  • Inspect plumbing systems and fixtures for leaks or issues

  • Test electrical systems for safety and proper function

  • Assess the foundation for signs of settling or cracks

  • Review the HVAC system to ensure efficiency

  • Check windows and doors for proper sealing and operation

  • Examine exterior finishes for any defects or damage

At the end of the inspection, we’ll sit down with you to review our findings. You’ll also receive a detailed report within 24 hours that you can submit to your builder as part of your warranty claim process.

Your home is likely one of the biggest investments you’ll make in your lifetime, and protecting it should be a top priority. A 1-Year Builder Home Warranty Inspection is an essential step in maintaining the integrity of your home and ensuring you get the most out of your builder’s warranty.

National Lead Poisoning Prevention Week Oct 20-26

Lead Hazards in Older Homes and Buildings

If your home was built before 1978, there's a higher chance it contains lead-based paint. Although the federal government banned the use of lead-based paint in 1978, some states enforced restrictions even earlier.

Lead-based paint can still be found in millions of homes today, often buried under newer layers of paint. While intact lead-based paint may not pose an immediate threat, deteriorating paint (peeling, chipping, or cracking) can release harmful lead dust, which requires immediate attention.

Lead-based paint is especially hazardous on surfaces that children may chew on or that experience frequent wear and tear, such as:

  • Windows and window sills

  • Doors and door frames

  • Stairs, railings, banisters, and porches

Tips for Reducing Lead Exposure in Older Homes:

  • Inspect and maintain painted surfaces: Keep painted areas in good condition, and clean dust regularly with a wet cloth or paper towel.

  • Hire a certified lead professional for renovations: Renovating or painting older homes can create toxic lead dust. Always consult a lead-safe certified contractor before starting projects that disturb painted surfaces.

  • Prevent lead dust from entering your home: Wipe and remove shoes at the door and place dust mats inside and outside entryways.

  • Check your water service line: Contact your water utility or a licensed plumber to find out if the pipe connecting your home to the water main is made from lead.

Lead exposure can be harmful, especially to children. Consider scheduling a lead inspection to ensure your home is safe and lead-free.

Learn more from the EPA here!

The Silent Threat: Understanding the Health Risks of Asbestos Exposure

Asbestos, a group of naturally occurring minerals once widely used in construction and manufacturing, poses significant health risks when its fibers become airborne and are inhaled. Despite its useful properties, such as fire resistance and durability, asbestos is now recognized as a hazardous material, and exposure can lead to serious health problems.

One of the primary conditions caused by asbestos exposure is asbestosis, a chronic lung disease characterized by lung tissue scarring, which results in shortness of breath, persistent cough, and chest pain. Another severe consequence of asbestos exposure is mesothelioma, a rare and aggressive cancer affecting the lining of the lungs and other organs, typically diagnosed at an advanced stage and associated with a poor prognosis. Asbestos exposure also increases the risk of lung cancer, particularly in individuals who smoke.

The effects of asbestos exposure often manifest many years after the initial contact, with a latency period ranging from 10 to 50 years. This delayed onset makes early detection and prevention crucial. If you suspect the presence of asbestos in your home or workplace, contact Alpine Building Performance for professional testing to protect your health.

The Hidden Dangers of Lead: Why Professional Inspection is Essential

Lead is a toxic metal that poses serious health risks, especially to children and pregnant women. Despite its dangers, lead was commonly used in paints, pipes, and other building materials until it was banned in residential properties in the late 1970s. Today, many older homes still contain lead-based materials, creating potential health hazards for their occupants.

Exposure to lead can cause a range of health problems. In children, lead poisoning can result in developmental delays, learning difficulties, irritability, and weight loss. For adults, lead exposure can lead to high blood pressure, joint and muscle pain, difficulties with memory or concentration, and complications during pregnancy. The effects of lead poisoning are often irreversible, making prevention and early detection critical.

Because lead is not always visible to the naked eye, it is essential to have a professional inspection if you suspect its presence in your home. Our certified lead inspectors use specialized and non-invasive analyzers to detect lead based paint in the home, no matter if it's been painted over. This thorough inspection process ensures that all potential sources of lead based paint are identified.

Attempting to test for lead yourself or ignoring the potential presence of lead can be dangerous. Disturbing lead-based materials during renovations or repairs can release toxic dust into the air, putting everyone in the home at risk. 

Given the severe health risks associated with lead exposure, it is crucial to rely on professional inspections to ensure your home is safe. Protecting your family's health and well being should always be a top priority, and professional lead inspections are a vital part of maintaining a safe living environment.

What does the gauge on a radon mitigation system mean?

The pressure gauge on a radon mitigation system, commonly known as a U-tube manometer or pressure gauge, is a simple device that measures the differential pressure in the radon mitigation system. This gauge DOES NOT tell you the radon levels in the home. It helps indicate whether the system is functioning correctly by showing the level of suction or vacuum being created by the fan that pulls radon gas from beneath the house and vents it outside.

How the Pressure Gauge Works:

  • U-Shape Tube: The gauge typically consists of a clear, U-shaped tube partially filled with a colored liquid (often water or oil-based).

  • Pressure Difference: One side of the U-tube is connected to the vent pipe, while the other side is open to the atmosphere. The liquid in the tube will be at different levels on each side if the fan is working properly, creating a pressure differential.

  • Measurement: The difference in the liquid levels, usually measured in inches, indicates the suction pressure. The exact value can vary, but typically, the liquid on the side connected to the vent pipe will be lower than the side open to the atmosphere.

What the Readings Mean:

  • Normal Operation: If the system is functioning properly, the liquid in the U-tube should have a noticeable difference in height between the two sides, indicating that the fan is creating sufficient suction.

  • No Suction (Equal Levels): If the liquid levels are the same on both sides, it suggests that there is no pressure difference, meaning the fan may not be working, the system could be blocked, or there is a significant leak in the piping.

  • Too Much or Too Little Pressure: If the pressure reading is significantly higher or lower than what is typical for your system, it might indicate an issue, such as a clogged pipe or a failing fan. Typically more than 1.5” offset indicates a problem. This could affect the system's efficiency in reducing radon levels.

Regular Monitoring:

Homeowners should periodically check the pressure gauge to ensure the radon mitigation system is operating correctly. If the levels change significantly or if the liquid levels are equal, it’s a sign that the system needs to be inspected by a professional to ensure it is effectively mitigating radon gas.

Pre-listing tips to avoid inspection limitations this winter

It’s hard to believe, but the first frost is approaching and the cooling temperatures mean that inspections will be somewhat limited due to seasonal factors. Specifically these 3 common cold weather limitations:

  1. A/C units cannot be operated in temperatures below 65 degrees F. This is an industry standard limitation that prevents risking damage to the components due to the viscosity of the oil in the compressor.

  2. Snow covered roofs and exterior surfaces cannot be visually inspected (self explanatory)

  3. Landscape irrigation systems and exterior hose bibs are winterized and cannot be tested. Inspection of the landscape irrigation systems is beyond the scope of a home inspection, but confirmation of these systems operating is often something that a buyer wants to check and cannot in the winter.

If you know that you have a listing coming up between now and late spring, here are some tips to help you prepare for a smooth inspection process. We all know that buyers hate inspection limitations and you can help put their mind at ease with these simple steps.

  1. Have the A/C unit professionally serviced by an HVAC technician with a written report confirming operation on that date. Make sure to schedule this prior to sub 65 degree days if possible as HVAC technicians are also limited by the temperature restriction.

  2. Have the roof pre-inspected by a reputable roofing contractor with a photo report generated showing the condition of the roof on that date. Unless there are major storms between that inspection date and the buyer's inspection date, the chances of unforeseen damages are low.

  3. Confirm operation of the landscape irrigation system before it’s winterized. This is something that your seller can even do on their own with photo evidence.

We don’t always have the luxury of foresight, but this is one time you can as long as you have enough lead time on the listing. Your sellers, the buyers and the inspector will all be impressed!